
How To Tune The Display Of Your Smartphone To Avoid Annoying PWM Problems
In this note, I will describe all the settings you need to tweak to get a 100% flicker-free, eye-friendly result on your smartphone.
However, some settings are quite extreme and you don’t need to apply all of them, such as the monochrome filter or
setting extremely high warm values on the color temperature slider.
PWM flickering is a “feature” of most digital displays at relatively low brightness levels that can cause eye strain and headaches.
Methods to avoid flickering:
- Increase brightness
[very bright image can be harmful too, so how to solve such contradicting situation?] - Lower refresh rate 60Hz
[strange thing that 60Hz screen mode delivers less PWM rather it’s high speed 120Hz counterpart, damn computers!] - Use DC dimming, which reduces screen brightness by adjusting the power supplied to screen rather than using PWM
[not available on older phones]
Other things to improve comfortability of using digital screen and to reduce eye strain:
- Enable dark mode to camouflage PWM
- Enable eye comfort mode to trim blue light spectrum
To check your device for flickering you don’t need expensive equipment.
All you need to do is to wave a pen or pencil behind the tested screen with a pure white fill in a relatively dark room with the brightness set to low.
If you see ghosting as in the image below, your device is not flicker free.
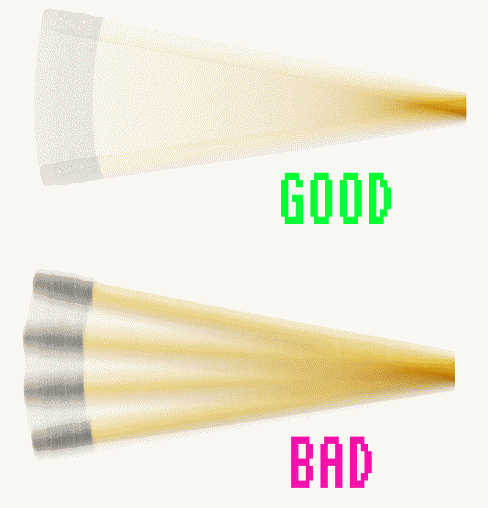
Picture of a generic pencil, to demonstrate flicker effect.
As for my opinion, all modern devices should be flicker-free.
But for some [don’t care?] reason top-end devices of Apple and Samsung have the worst PWM
contrary to cheaper Chinese brands like Vivo and Oppo, which are affected by this problem to a smaller degree or not affected at all.
Ok then, back to the problem solving. I will demonstrate the available settings for Oppo Find x6 Pro.
Owners of other smartphones can find similar settings on their own.
First of all you need to enable PWM dimming in developer’s settings:
SETTINGS ► Additional settings ► Developer options ► Display ► High-frequency PWM dimming ► On
Battery use will increase, but we will compensate power consumption later on. And yeah, option is not available on older devices.
Developer settings can be enabled here:
SETTINGS ► About device ► Version ► Build number ► Tap 5-6 times in a row
Appropriate setting should appear here:
SETTINGS ► Additional settings ► Developer options
Here is a list of important options that may be useful in reducing eye staining and migraine headaches:
SETTINGS ► DISPLAY & BRIGHTNESS ► Dark mode ► On
SETTINGS ► DISPLAY & BRIGHTNESS ► Video Color Boost ► Off
SETTINGS ► DISPLAY & BRIGHTNESS ► Bright HDR video mode ► Off
SETTINGS ► DISPLAY & BRIGHTNESS ► Screen resolution ► Standard
SETTINGS ► DISPLAY & BRIGHTNESS ► Screen refresh rate ► Standard
SETTINGS ► DISPLAY & BRIGHTNESS ► Nature Tone Display ► Off
SETTINGS ► DISPLAY & BRIGHTNESS ► Eye Comfort ► On
SETTINGS ► DISPLAY & BRIGHTNESS ► Eye Comfort ► Screen color temperature ► High
If you can live with black and white color, which can potentially reduce eye strain even more. Setting can be enabled in couple places:
SETTINGS ► DISPLAY & BRIGHTNESS ► Eye Comfort ► Black & white ► On
SETTINGS ► Additional settings ► Accessibility ► Vision ► Color vision enhancement ► Grayscale
If you don’t have PWM dimming option in your smartphone, there is a quite nice workaround called [OLED Saver]
.
For people that don’t have google play store [like myself] application can be obtained by means of [Aurora Store]
.
Software needs to be enabled as a services in accessibility settings and you should provide some permissions to get things rolling.
OLED saver has a nice embedded explanation of the whole process.
It also features very neat pixel filter, that turns off half of pixels on screen to consume less power, prevent pixel burn-in
and more importantly deliver awesome CRT effect! Can be enabled on boot and doesn’t require root.
Repeat the pencil test after all settings have been applied to ensure that trailing ghosting is eliminated completely.
I hope this note was helpful and have a nice day.
